Saturday, September 17, 2011

Blog Hop~ All About The Guys


 So I am going to try to show you and explain to you how I made this awesome card! This card is so cool and is a great idea for Christmas presents...It's cheap and its sentimental!
This card is my first Squash Card! Yes you read right; squash card!
This is a unique card! 

Here its is....

This is the front of the card!


When you open the card this is what is in the inside!
Hence the words SQUASH !


OK So how did I make this... Just read below!


You need a 4x4 cardstock card
and
3x3 card stock card
(Total of two)
this will be your lid and the last piece of  your card


Now place the 3x3 card in the middle of the 4x4 card and glue them together.


Then cut an angle on all 4 sides of the lid


Then fold all 4 sides down and glue them


This is what the lid should look like once you finish gluing the sides down.


Now put those lids and base on the side and get a 6x6 piece of cardstock


Then score at the 3' mark on both sides of the card, when you finish with that you should have a tic tac toe board. Then your going to fold one of the points of your card to another point and you should have made a triangle. You need to do a total of (3)


So when your finish doing this it should look like this...


Now when you do this make sure you place all three diamond cards where the middle line is up and down. Then take the middle card and glue the sides together. The left one should over lap on top of the middle card. The right card should be underneath the middle card.


(note this is important to do this)


Sorry I didn't take any pictures of how to the next step...but this is what you should do.
Once you glue the sides together place the paper upwards take the first card and press the two triangles that are on the side and press them towards you. Then it should all fall into place. Then take the second diamond cardstock and press the two triangles on the side away from you. The third diamond cardstock press them towards you again. Then it should squash all the pages and then glue your lid on top and glue the bottom on the bottom of the card. Then WA-la you should have a cute squash card!


I wanted to show you all what was inside
This was my Ethan during his transplant.
He was 15 months old.


Well this is my very first squash card..

Hope you all like this...tell me what you all think!

I didn't want to leave Haley out so I made her one as well.
Here is hers..


Next you should go to
Erica's blog
to be entered into a giveaway!
Incase you got lsot along the way
Erica http://mycricutcraftroom.blogspot.com

Melissa http://pinkpolkadotscrappingblogspot.com ----you are here----
Erica’s Blog Candy J


Friday, September 16, 2011

Festive Friday.... Christmas


Good Morning to everyone!
Today is one of my favorite days over at My Cricut Craft Room. It is Festive Friday! Since Christmas is right around the corner I thought what better way to get my Christmas cards done. So you all will see a lot more Christmas Items right here on my blog. I hope I inspire you to, to start making your Christmas cards as well.
~~~~~~~~~~~~~~~~~~~~~~~~~~~~~~~~~~~~~~~~~~~~~~~~~~~~~~~~~~~

So I wanted to do something new and fun. I have never even seen a Quilted card before.
I found this lady named Mary who made a similar card like mine but her card was spring themed! This card is really awesome and unique! I love different!

Here it is ...


How I made his card was ....
You first need to decide on your paper. You need (2) Plain color cardstock and (2) Patterned paper
The red piece of paper was cut at 4x4 and the white piece was cut at 3 1/2 x 3 1/2. The next piece will be your quilted piece and that was cut 2 1/2x 2 1/2 .
The little squares were cut at 1 inches.
I cut (3) pepperment pieces. (2) Brown patterned paper. (4)Regular red paper. Then (1) piece of the plain brown cardstock and cut that in triangles and then cut them in smaller triangles. I then put my patterned that I wanted on my quilt . *Note make sure you don't glue the pieces until you are sure that you like your pattern* 

Then I glued my patterned onto my 2 1/2 x 2 1/2 cardstock and then glued it to the 4x4 cardstock and used ink to ink the sides and then glued it to my card base.

Inside~~~~~~~~~~~~~~~~~~~


I added a little touch to the inside. I used the Enjoy Everyday Cartridge for the reindeer. I didn't have any stamps to use that were Christmas so I just hand wrote Seasons Greetings!
Then I cut circles using my fiscars punch; to make the peppermint balls. I cut a total of (6) and divided them up by 3 and made a little embellishments to add to my card!

Well this card was super easy and I loved how it came out! I hope you all like it too.
Please stop by tomorrow to see what I made for the blog hop! Have a great Crafting Day!


Wednesday, September 14, 2011

Theme Day Thursday! BABY....

Hello All!
 I hope your weekend is going great so far! One more day till Friday! Yippee... So today's theme BABY! Check out over at My Cricut Craft Room to see what the other designer's made for today's Theme.
~~~~~~~~~~~~~~~~~~~~~~~~~~~~~~~~~~~~~~~~
I love this Theme because my son is still a baby, he will be 22 months on the 23rd of September!!

So I am going to try to show you and explain to you how I made this awesome card! This card is so cool and is a great idea for Christmas presents...It's cheap and its sentimental!
This card is my first Squash Card! Yes you read right; squash card!
This is a unique card! 

Here its is....

This is the front of the card!


When you open the card this is what is in the inside!
Hence the words SQUASH !

OK So how did I make this... Just read below!


You need a 4x4 cardstock card
and
3x3 card stock card
(Total of two)
this will be your lid and the last piece of  your card


Now place the 3x3 card in the middle of the 4x4 card and glue them together.


Then cut an angle on all 4 sides of the lid

Then fold all 4 sides down and glue them


This is what the lid should look like once you finish gluing the sides down.

Now put those lids and base on the side and get a 6x6 piece of cardstock


Then score at the 3' mark on both sides of the card, when you finish with that you should have a tic tac toe board. Then your going to fold one of the points of your card to another point and you should have made a triangle. You need to do a total of (3)
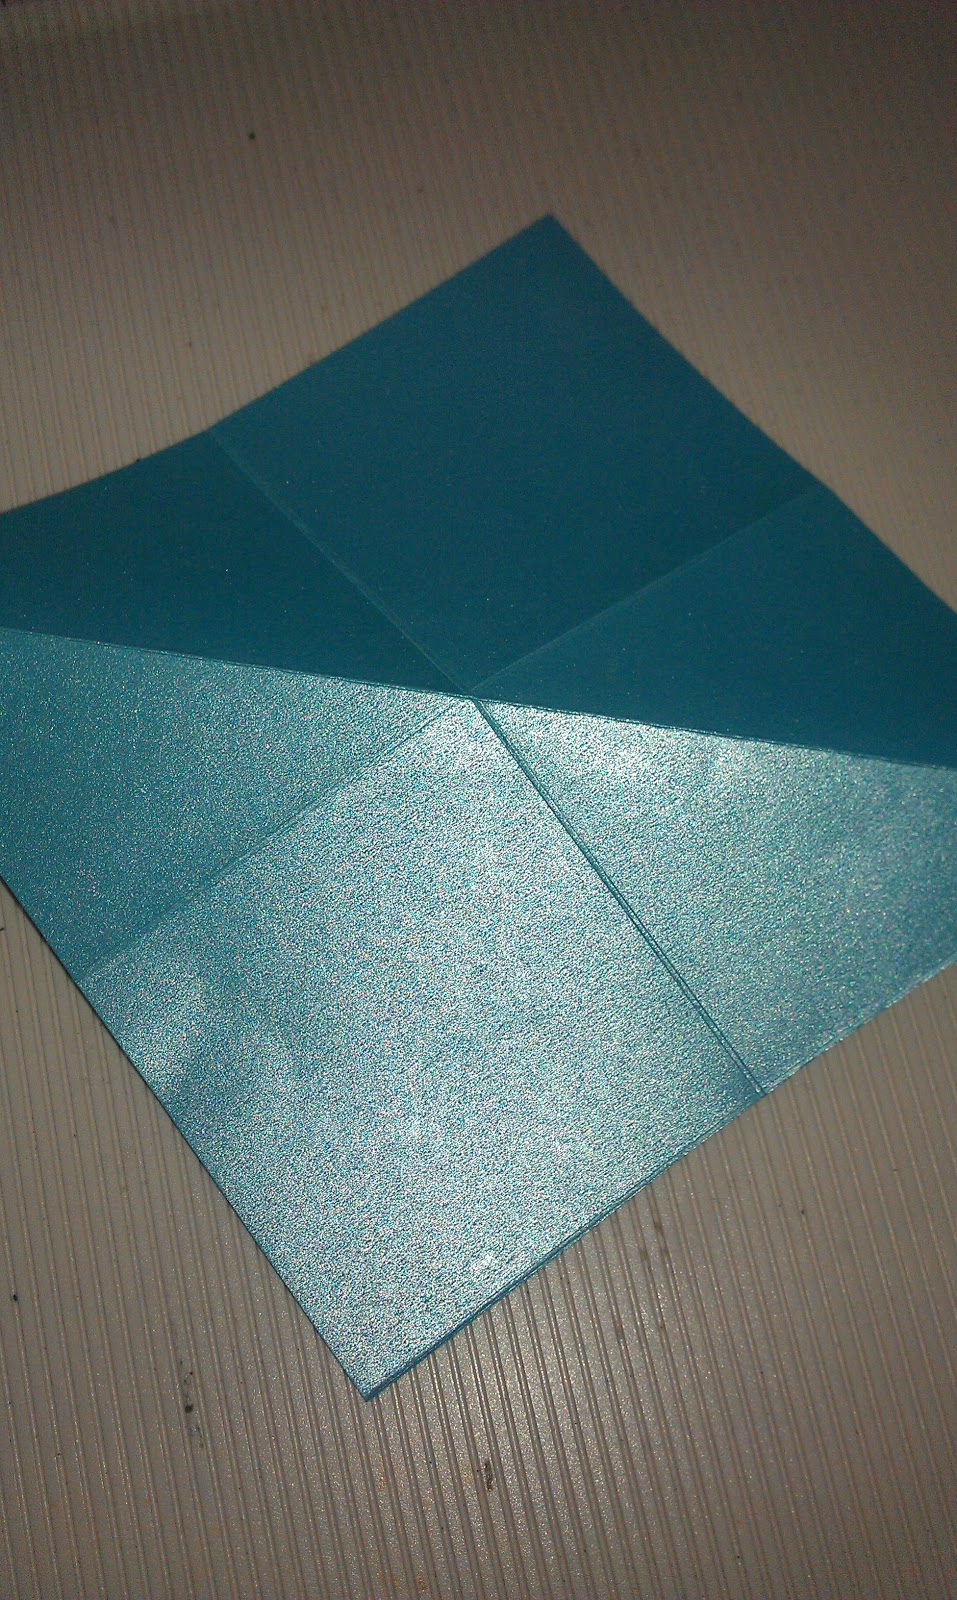
So when your finish doing this it should look like this...


Now when you do this make sure you place all three diamond cards where the middle line is up and down. Then take the middle card and glue the sides together. The left one should over lap on top of the middle card. The right card should be underneath the middle card.


(note this is important to do this)


Sorry I didn't take any pictures of how to the next step...but this is what you should do.
Once you glue the sides together place the paper upwards take the first card and press the two triangles that are on the side and press them towards you. Then it should all fall into place. Then take the second diamond cardstock and press the two triangles on the side away from you. The third diamond cardstock press them towards you again. Then it should squash all the pages and then glue your lid on top and glue the bottom on the bottom of the card. Then WA-la you should have a cute squash card!


I wanted to show you all what was inside
This was my Ethan during his transplant.
He was 15 months old.


Well this is my very first squash card..

Hope you all like this...tell me what you all think!

I didn't want to leave Haley out so I made her one as well.
Here is hers..


No

Next your should go to
Erica's blog
to be entered into a giveaway!
Incase you got lsot along the way
Erica http://mycricutcraftroom.blogspot.com

Melissa http://pinkpolkadotscrappingblogspot.com ----you are here----
Erica’s Blog Candy J