Saturday, September 29, 2012

Magical christmas!

CREATIVEKUTS HALLOWEEN BLOG HOP HERE


Hey there friends, o my goodness its the weekend. I don't know about you but its been a long week! I wanted to share with you all this awesome Iris Card that I have made!

StampnPlus Christmas Iris Fold Card


Supplies

Vellam Paper (Blue, pink, Silver, Baige)
Fiscars Winter Wonderland Stamp
StampNplus Christmas Iris Ornament Stamp
Snowflake Embellishment
Stazon Jet Black Ink
Blue Ribbon

Please visit Stampnplus to see more details about this stamp!
Thanks so much for stopping by!
I would love to read your comments. Have a Great Crafting Day!


Friday, September 28, 2012

Happy Halloween Blog Hop!

Wednesday, September 26, 2012

I Dream Of Flowers!

Hey there and welcome!
I wanted to share with you a project that I have made for my twin sister using Creativekuts2 Files. If you have never been to there web store you should really check it out! So many cute 3D projects! Here is the Store Link!

So I wanted to share with you another wall decor project that I have made. This was inexpensive to make.

Here is my creation!


(Close up of the Top )
(

( Close Up Of CreativeKuts Flowers)


Supplies:

Todays project was easy and cheap. So if your looking for ideas to make someone for the up coming holidays, keep this in mind! Hope you all have a great crafting day and check back here this weekend to see my Halloween creation!
Thanks for stopping by!

Tuesday, September 25, 2012

Pumpkin Iris Card!

Hey there and happy Tuesday!
Today I wanted to share with you an Iris Card that I have made!


This stamp that I used is from Stamp N Plus and it is QIR276 you can find it by clicking here!
I made this card by stamping the image and then used orange and black vellum. Then I colored the hat and straw with my aqua markers.
The sentiment is also a StampNPlus stamp (X110) and you can also find that here.
Hope you like my card that I have made!

This card has been entered in the following Challenges:

Stamp and Create Anything Goes Challenge

Totally stampalicious  Fall Colors

Qkrstampede Fall Fun


Wish me Luck!!! Well I hope I have inspired you today! More to come.. don't forget this weekend join me in a spooky Halloween Hop hosted by Creativekuts! I have a spectacular creation that I can not wait to share! Have wonderful crafting day!


Friday, September 21, 2012

Cupcake Wars Blog Hop!


Welcome to Cupcake Wars! No bloodshed here, just plenty of sugar! If you didn't start at Janet's Blog  please do so! She's giving away a Cricut Lite Cartridge-Cupcake! How sweet is that?
We don't want you to miss any of the scrumptious projects and some have even left recipes for you to try! As we head into the holiday season, you might just have a new family favorite!
You should have come from the fabulous  Amber  I'm so glad you're here now, so check out my project and what I cooked up for you!

My Favorite Holiday is Halloween, and I wanted to share my HHalloween cupcake creation with you .. Here it is...


( Close up of the Spiders)


(Close up of the Witch)


When you open the lid the Cupcake is presented! This is really neat.. This would be perfect for the Kids at school!
How I made this was using the Sweet Tooth Box Cricut Cartridge. In there is an Ice Cream cone but you can just use the top part of it as a Cupcake Box!

Supplies:
Sweet Tooth Cricut Cartridge (Cupcake Box)
Paper: Stash Bin
Ribbon: Silver from my Stash
Happy Haunting Cricut Cartridge (Witch, and Spiders)
Lacy Labels Cricut Cartridge ( The Moon)


How I made this was I going for a witch's theme. So I found the Orange and Black striped paper and was thinking of the lines of a witch's stocking and I I found the Spider web paper and wanted to make it for the top to get the effect of icing! I cut the Cupcake top and bottom at 8 1/2" . This is the size for a Regular size cupcake.
 Then took silver ribbon and NOTE: when placeing ribbon on cupcake make sure you do not have the cupcake made yet.. when you cut the paper out place adhesive double sided tape on just below the decorative cuts and then I used wire ribbon to make the wave look on the cupcake. Wire ribbon is a lot easier when you are trying to do that in my opinion. Then I cut the witches at 1 1/2" and the moons at 1 3/4". The Spiders were cut at 6 1/2".


Here is a Cupcake Recipe that you might Like to try:

Recipe:

BROKEN GLASS CUPCAKE
MARTHA STEWART:

Ingredients

  • For the Cupcakes

    • 4 1/2 cups cake flour (not self-rising)
    • 2 tablespoons baking powder
    • 1/2 teaspoon ground cinnamon
    • 1/4 teaspoon freshly grated nutmeg
    • Salt
    • 1 1/2 cups whole milk
    • 1 tablespoon pure vanilla extract
    • 2 sticks plus 2 tablespoons unsalted butter, room temperature
    • 2 1/4 cups granulated sugar
    • 7 large egg whites, room temperature
  • For the Caramel

    • 1 1/2 cups granulated sugar
    • 3/4 cup water
  • For the Frosting

    • 1 pound cream cheese, room temperature
    • 2 sticks unsalted butter, room temperature
    • 6 cups confectioners' sugar
    • 1/2 teaspoon pure vanilla extract
    • 1 cup cherry preserves, strained, for garnish

Directions

  1. Preheat oven to 350 degrees. Make the cupcakes: Line cupcake tins with baking cups. Sift flour, baking powder, cinnamon, nutmeg, and 3/4 teaspoon salt into a medium bowl. Combine milk and vanilla in a measuring cup.
  2. Beat butter with a mixer on medium-high speed until pale and fluffy. Reduce speed to medium, and gradually add granulated sugar in a slow, steady stream. Beat until pale and fluffy, about 3 minutes. Reduce speed to low, and add flour mixture in 3 additions, alternating with milk mixture, beginning and ending with flour.
  3. In a clean bowl, whisk egg whites with a mixer on medium-high speed until stiff peaks form. Fold one-third of the whites into the cupcake batter. Fold in remaining egg whites in 2 batches.
  4. Divide batter among baking cups, filling each halfway full. Bake until a toothpick inserted
    into the center of each comes out clean and the tops spring back when lightly touched, 18 to
    20 minutes. Let cool completely in tins set on wire racks.
  5. Meanwhile, make the caramel: Bring granulated sugar and water to a boil in a small high-sided saucepan, stirring, until sugar dissolves. Reduce heat to medium-high, and cook until mixture just starts to turn pale gold around edges. Remove from heat, and immediately pour caramel onto a rimmed baking sheet. Working quickly, tilt pan to spread caramel to edges to make a very thin layer. Let cool to harden.
  6. Make the frosting: Beat cream cheese and butter with a mixer on medium-high speed until pale
    and fluffy. Gradually add confectioners' sugar and vanilla. Beat until creamy and spreadable.
  7. Frost each cupcake using an offset spatula. Twist pan to release and break caramel in order for it to resemble broken glass. Place a shard or 2 of caramel "glass" in the center of each cupcake. Drizzle or pipe cherry preserves where caramel has entered the cupcake.

Cook's Note

Frosted cupcakes can be refrigerated for up to 1 day. Top with caramel shards and cherry preserves just before serving

I hope I have inspired you today! 
                  From here you should head over to the fabulous Ashley

Thanks for stopping by! Now on to more yummy ideas!


Wednesday, September 19, 2012

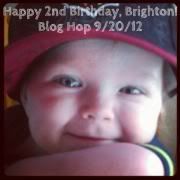
Happy 2nd Birthday, Brighton Blog Hop!

Brighton

Welcome to a very special celebration for a very special little boy. Brighton is a sweet little boy who has had a rough start to his life. The doctors believe Brighton has a rare metabollic disease called mitochondrial disease.
Mitochondrial disease is an energy depleting disease. You can read more about Mitochondrial disease at Http://www.umdf.org or http://www.mitoaction.org.

Brighton has made it to his 2nd birthday, despite all the challenges that he has faced this year. So we are all gathering to celebrate and cheer.
Today several talented crafty friends have decided to join me in this celebration!
If you started came from (blog before you) then you are in the right place. If not please go back to the beginning at Shawnee's blog and be sure to see all the amazing projects.
 We have some great sponsors for this hop they include:
                                   
Like her fan page HERE
(GC is for regular priced items, not sale prices)

A dust cover for a Silhouette Cameo from Wunder's Creations
Like her page here

 This adorable Mini Album Kit from HoneyBearzdesigns                           

Head on over to her fan page here

An adorable Stamp Set from Mary at CardzTV Stamps

Requirements to enter  
Leave a comment on each blog
Follow each sponsor on FB (if you don't do fb let us know)
Leave a comment on Shawnee's blog with your birthday wish for Brighton

I wanted to say Happy Birthday To you Brighton! You are so lucky to have a Mommy  and Daddy who loves you O so very much! Your Mommy and Daddy  treasures each day with you! The love and joy that you bring to your Mommy and Daddy  is very special! Little Brighton I hope you have a very special day and many more days of celebrations of "LIFE"!! You are one amazing little boy! God has great plans for you
 Happy Birthday! 

Here is what I have made for Little Brighton! Happy Birthday!  


Now you are onto your next party stop!! Maria
Here is the line up below just in case you get lost on your way! Thanks so much for joining us today on this very Special Hop!

1. Shawnee - http://quiverofangels.blogspot.com
2. Rachelle - http://creationsbyrachelle.blogspot.com/
3. Mary - http://cardztv.blogspot.com/
4. Anita - http://www.anitaandbugs.blogspot.com/
5. Melissa -http://pinkpolkadotscrapping.blogspot.com/ -HERE-
6. Maria - http://JoyfulStamper.blogspot.com -NEXT
7. Lisa P - http://handmadewithlove-lisa.blogspot.com/
8. Jennifer R - http://craftycardgallery.blogspot.com/
9. Nicolette- http://beyondscrapin.blogspot.com
10. Colleen ~ http://www.cbcscrapbooking.blogspot.com/
11. Jennifer J ~ http://creativecricutdesigns.blogspot.com/
12. Pamela ~ http://kraftykatstampstudio.blogspot.com/
13. Jennifer F ~ http://wunderscreations.blogspot.com/
14. Sandy S. - http://simplycraftycreationsbysandys.blogspot.com/
15. Lisa T. - http://bitbythecricutbug.blogspot.com/
16. Beth ~ http://motherandaughterdesigns.blogspot.com


Tuesday, September 18, 2012

Christmas Wishes!

Happy Tuesday! Today I am showing off two fabulous Creativekuts2 files. I made a Ribbon Rolled Flower and a Rolled Petal Flower.
 
Here they are.....


I made these using Blue and Green Cardstock and added some Angle Glitter Spray to the Petals.


I displayed these flowers on a Wooden Oval Board from Micheal's. Then I added some Cream and Red burgundy Paper and used Decoupage to it. Then inked the edge with Brown Martha Stewart Ink. The image that you see is from a Magazine and I cute it in sections so I can make a 3D image pop! The images is popped up 4 times if you look closely! Then two add even more of a Vintage look to this Home decor Christmas Image I used Lace Ribbon and made a bow and placed a Vintage Snowflake embellishment to it!

This was a lot of fun to make! I can hang this up for Christmas Decoration, and boy its going to look nice with mt theme this year Vintage! If you like these flowers come check out them over at Creativekuts2.com and there are more awesome files.

I hope I have  inspired you today! Come back to see more creations by me! Hope you have a wonderful Tuesday!

Wednesday, September 5, 2012

StampNPLus Back To School Challenge #4

Hey there, thanks for stopping today!
 I wanted to share with you all a card that I had made for StampNplus DT. This Month's Theme for our Challenge is " Back To school"!

I had a hard time because I do not own any "Back To School" stamps by StampnPlus, So I had to really think out of the box on this one! 

Here it is...


( Side View)

This card is called a  Side Spring Card! Pretty different I would say so!
To make one of these cards here is a tutorial from Splitcoaststampers!

The stamp that I had used was Hearts In A Gown! W-IR-152
Also if are interested in learning how to do Iris Folding.. StampNplus does have instructions how to use the stamp properly!
So what are you waiting fo! Come join us in our monthly Challenges and you could win up to thitty-five dollars in stampnplus stamps.. To join the challange go HERE!
  To check out StampNplus stamps go HERE!!

Thanks for stopping by! Come back tomorrow to see what I have made using a CreativeKut File! Have a great day!!

Tuesday, September 4, 2012

Cradle Gift Holder! CreativeKuts2 File!

Hello and welcome to my blog! I hope I will Inspire you today.

My friend is soon going to be a first time GRANDMA! So I wanted to make something for her daughter. So when I seen this file over at www.creativekuts2.com  I was thinking how perfect is this! I have made a Cradle Gift Holder ...


This file is 3.00 ! Also if you Hand Cut files like I do this one was very simple to cut and put together!
Think how cute this would be for baby showers!!! Super adorable!

Ingredients:

Cardstock: Recollections (Light Pink)
paperstack: Nana's Baby Girl
Liquid Pear:Bisque
Lace: Out of my Stash
Inks:Tim Holtz Distress Ink Pad
pop dots


Thanks for stopping by today and there are more Inspiring projects that I am working on so make sure you come back and check them out! Have a Great Day!

This Cradle Gift Holder has been entered in My Crafting Channel Challenge#5 3D Projects!
Wish me LUCK!!